Homemade Reese’s Cups Mini Bites
Highlighted under: Heavenly Sweets
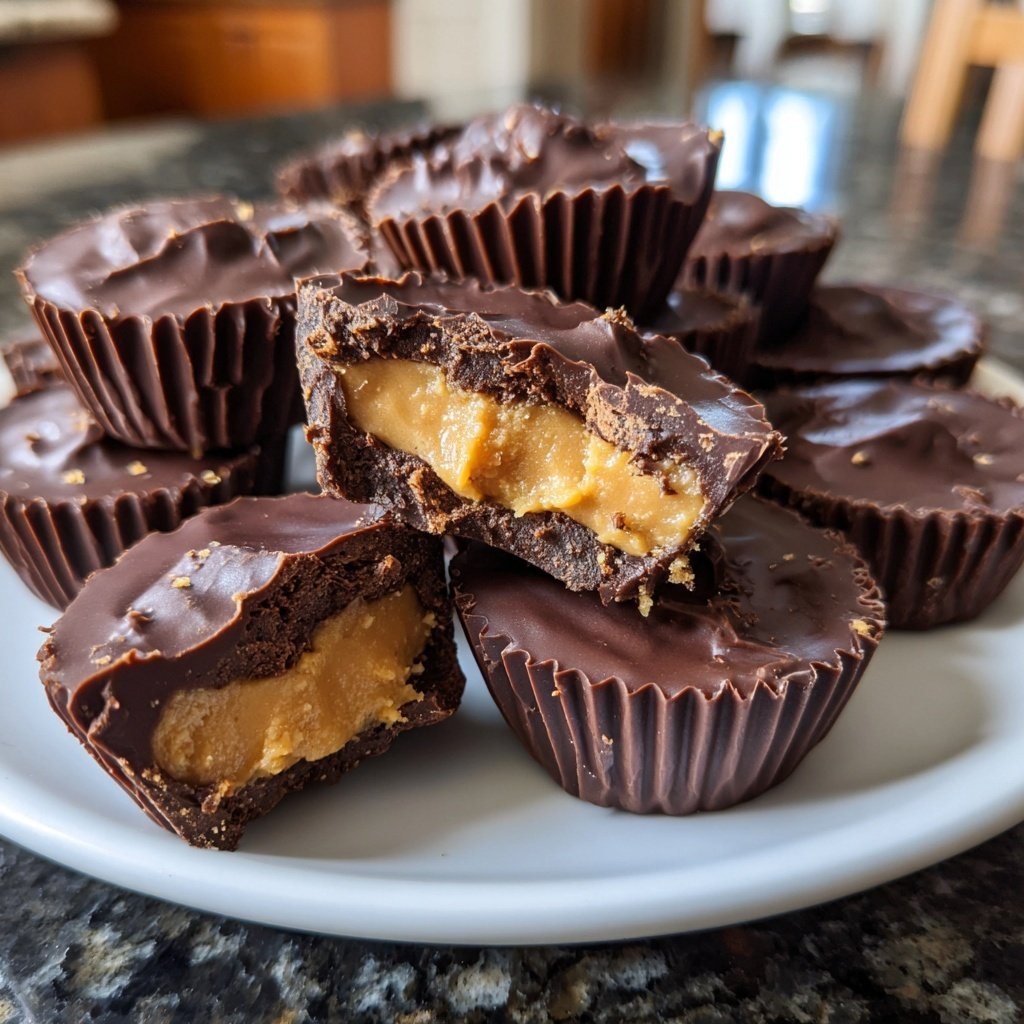
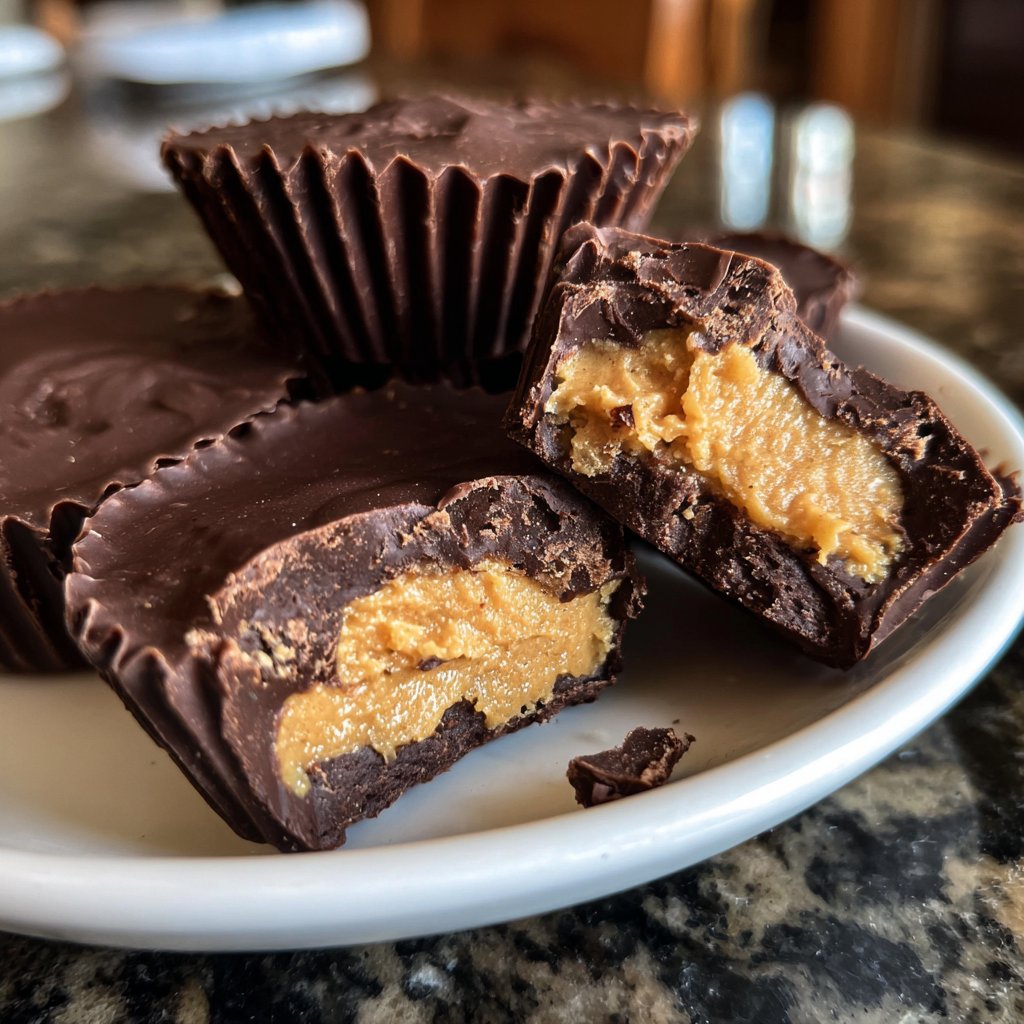
I love making my own Reese’s Cups Mini Bites because they combine the rich taste of chocolate with creamy peanut butter in the perfect bite-sized treat. This recipe is incredibly simple and lets me control the ingredients, ensuring they are as fresh and delicious as possible. My family can’t get enough of them, and they are perfect for sharing during gatherings or enjoying as an indulgent snack. Plus, once you try making these at home, store-bought versions will never satisfy your cravings again!
When I first attempted to make these Homemade Reese’s Cups Mini Bites, I was amazed by how easy and fun the process was. The key is to layer the chocolate and peanut butter just right. To achieve this, I found that using silicone molds worked wonders for the perfect bite-sized shape and ensured a smooth release after freezing.
Each mini bite has the texture I crave, thanks to the combination of creamy peanut butter and silky chocolate. I recommend trying different types of chocolate or adding a pinch of sea salt on top for an extra gourmet touch. You’ll be whipping up these delicious treats in no time!
Why You Will Love This Recipe
- Decadent chocolate exterior surrounding creamy peanut butter goodness
- Quick and easy to make, perfect for any skill level
- Customizable fillings make them fun for everyone
Perfecting the Chocolate Coating
The key to achieving a glossy, professional-looking chocolate coating is in the melting process. Using a microwave is convenient, but it’s essential to melt in short intervals to prevent overheating. Chocolate can seize quickly, so stir until smooth after each interval. If using a double boiler, make sure the water doesn’t touch the bowl with the chocolate. This gentle heat will help keep the chocolate silky and prevent it from burning.
Coconut oil not only aids in achieving a smoother chocolate texture but also helps create a perfectly shiny finish. For an alternative, you can use vegetable oil, but the flavor will differ slightly. Ensure that the chocolate is fully melted and glossy before pouring into molds—this will guarantee a beautiful, even coating around the peanut butter filling.
Crafting the Peanut Butter Filling
The peanut butter filling is what makes these mini bites truly special, and the balance of ingredients is key. Using creamy peanut butter allows for easy mixing and a smooth texture that contrasts beautifully with the hard chocolate exterior. If you're looking to reduce sugar, you can decrease the powdered sugar or substitute with honey or agave syrup, but this may alter the consistency slightly. Be sure to mix the filling until completely smooth to avoid any lumps.
Consider adding a pinch of sea salt to the peanut butter filling for a touch of contrast against the sweetness. This enhancement brings out the peanut flavor and adds depth. If you have allergy concerns, sunflower seed butter or almond butter are great alternatives, though they will slightly change the flavor profile of your mini bites.
Storing and Serving Suggestions
Once your Homemade Reese's Cups Mini Bites are ready, enjoying them fresh is a delight, but they store beautifully too! Keep them in an airtight container in the refrigerator for up to two weeks. To maintain their texture, let them sit at room temperature for about 10 minutes before serving, allowing the chocolate to soften just enough for that perfect bite.
If you want to make a larger batch for a party or special occasion, you can easily double the ingredients. Just ensure to adjust the melting time for the chocolate, as larger quantities may take a bit longer. For a fun twist, consider dipping the mini bites in finely chopped nuts or sprinkles right after the chocolate coating for added texture and visual appeal.
Ingredients
For the Chocolate Coating
- 1 cup semi-sweet chocolate chips
- 1 tablespoon coconut oil
For the Peanut Butter Filling
- 1/2 cup creamy peanut butter
- 1/4 cup powdered sugar
- 1 teaspoon vanilla extract
Make sure all ingredients are at room temperature for easier mixing.
Instructions
Melt the Chocolate
In a microwave-safe bowl, combine the semi-sweet chocolate chips and coconut oil. Microwave in 30-second intervals, stirring until smooth and fully melted.
Prepare the Molds
Using a spoon, add a small amount of melted chocolate to the bottom of silicone molds to create the base. Use enough to cover the bottom thinly.
Make the Filling
In a separate bowl, mix the peanut butter, powdered sugar, and vanilla extract until smooth and well blended.
Fill the Molds
Once the chocolate base has set slightly, spoon a small amount of the peanut butter mixture on top of each chocolate base in the molds.
Top with Chocolate
Pour more melted chocolate over the peanut butter filling to cover it completely. Ensure that the chocolate layer is even and smooth.
Chill
Place the molds in the freezer for about 20 minutes, or until the chocolate has completely hardened.
Serve
Carefully pop the mini bites out of the molds and enjoy! Store any leftovers in an airtight container in the fridge.
These mini bites are best enjoyed chilled!
Pro Tips
- Experiment with different types of nut butters or add toppings like crushed nuts for extra texture.
Common Mistakes to Avoid
One common mistake when making the chocolate coating is not allowing the chocolate to cool slightly before pouring it into molds. If the chocolate is too hot, it can cause the peanut butter filling to melt, leading to a messy mixture. Always allow your melting chocolate to cool for a minute or two before proceeding to ensure layers stay distinct and visually appealing.
Another mistake to watch for is underfilling your molds. Aim for uniform thickness in the layers—too little chocolate at the bottom may lead to a ‘soggy’ outcome because the filling won’t have adequate support. Likewise, make sure to get your proportions right when making the filling; too much powdered sugar might make it too sweet, while too little can create a runny filling.
Customizing Your Treats
This recipe is incredibly versatile, allowing you to customize your mini bites in a variety of ways. You can replace the vanilla extract in the filling with almond extract for a nutty undertone, or incorporate other flavorings like coconut or coffee for a unique twist. Just remember to adjust sugar levels based on the sweetness of any additional ingredients.
Want a bit of crunch? Mix in chopped nuts, crispy rice cereal, or even crumbled cookies into your peanut butter filling before spooning it into the molds. This not only adds texture but also interesting flavor variations that can make every bite a bit different, keeping your taste buds guessing!
Questions About Recipes
→ Can I use milk chocolate instead?
Absolutely! Milk chocolate will give a sweeter flavor profile, just ensure to adjust the sweetness of the filling if needed.
→ How can I store these mini bites?
Store them in an airtight container in the refrigerator for up to a week, or in the freezer for longer freshness.
→ Can I make these vegan?
Yes! Use dairy-free chocolate chips and ensure your peanut butter is free from any added sugars or oils.
→ What can I use instead of powdered sugar?
You can use honey or maple syrup, but the texture will be slightly different.
Homemade Reese’s Cups Mini Bites
Created by: Diana Brooks
Recipe Type: Heavenly Sweets
Skill Level: Beginner
Final Quantity: 24 mini bites
What You'll Need
For the Chocolate Coating
- 1 cup semi-sweet chocolate chips
- 1 tablespoon coconut oil
For the Peanut Butter Filling
- 1/2 cup creamy peanut butter
- 1/4 cup powdered sugar
- 1 teaspoon vanilla extract
How-To Steps
In a microwave-safe bowl, combine the semi-sweet chocolate chips and coconut oil. Microwave in 30-second intervals, stirring until smooth and fully melted.
Using a spoon, add a small amount of melted chocolate to the bottom of silicone molds to create the base. Use enough to cover the bottom thinly.
In a separate bowl, mix the peanut butter, powdered sugar, and vanilla extract until smooth and well blended.
Once the chocolate base has set slightly, spoon a small amount of the peanut butter mixture on top of each chocolate base in the molds.
Pour more melted chocolate over the peanut butter filling to cover it completely. Ensure that the chocolate layer is even and smooth.
Place the molds in the freezer for about 20 minutes, or until the chocolate has completely hardened.
Carefully pop the mini bites out of the molds and enjoy! Store any leftovers in an airtight container in the fridge.
Extra Tips
- Experiment with different types of nut butters or add toppings like crushed nuts for extra texture.
Nutritional Breakdown (Per Serving)
- Calories: 150 kcal
- Total Fat: 10g
- Saturated Fat: 3g
- Cholesterol: 0mg
- Sodium: 50mg
- Total Carbohydrates: 12g
- Dietary Fiber: 1g
- Sugars: 9g
- Protein: 3g